Saturday, August 31, 2013

Samples

It's always great to get sample materials when attending conferences. Last year while attending the Florida Arts Education Association conference in St. Petersburg I loaded up on goodies! I understand the purpose of them is to try them out and then to purchase them in quantity, but I always have a hard time putting them to use. In a sample, there isn't enough to go around for an entire class, so I feel guilty and all of those fun treasures sit, neglected in the bottom of a bag.

While preparing for the new school year, I decided to put these goodies in a box that I might use as prizes sometime this year. I came across some window crayons and markers by Crayola, and thought I would test them out.

The crayon has a twist-up end that helps protect the material.
Since I'm always running out of bulletin board and wall space, I decided to use the office window.

 I used the crayon to write some basic expectation reminders on my office window. I used a dry erase marker to first write the message on the outside of the window. Then I used the crayon, which is more opaque and easier to read, to trace the lettering on the inside of the window. After wiping away the dry erase marker, I was able to see the message very clearly. It actually shows up best with the light off! The message is protected from wandering kiddo hands because it is on the inside of the window!

I used the window markers and the window crayon on the windows that face the courtyard of the school. On each of the four windows I wrote one of the student expectations. I once again wrote on the inside of the window after I removed the screen. I felt more confident in writing backwards and didn't worry about spelling out my messages on the other side of the glass.


The messages show up a little less than I would have liked. The markers are very difficult to see. I used the crayon to outline block letters and that really helps with the visibility of these positive reminders.

When I went back to photograph the windows I also found that the humidity had caused the marker ink to run overnight while the air conditioner was not on. I like the idea, and find that the window crayons work the best, so I will be ordering some of these for my future messages. Until then, I guess I have to wipe the windows and start fresh.

Pinterest Party

Our inspired principal threw a "Pinterest Party" at the end of our last planning day. Each teacher was invited to share an idea that we had gleaned from Pinterst and share with our colleagues. I know that many of us follow each other on the site, but there are some that we don't and this offered us a great opportunity to see what other teachers might be doing to improve their classrooms. 

While I have not seen this storage idea on the site of pins, I think it is pin worthy. As an art teacher I have lots of things to organize and store, I also would prefer to not spend my supply budget buying storage containers when there are perfectly suitable boxes and trays for free right here at school.


Our school cafeteria gets these fantastic cardboard boxes filled with milk. The students get milk with both breakfast and lunch, which means there are plenty of these beauties going in the recycling everyday! I asked the kitchen staff to save me a few and was surprised to have about 30 boxes by the end of the day.

I cut a label from construction paper that I could apply to the end of the box. I had these labels laminated so they were more durable and so that I could easily write on them with a wet erase marker.

The boxes have great interlocking tabs on each side which allows them to easily stack on top of each other.

As you can see I have made a start to my supply closet organizing with more materials to sort and store in the future. I like that I can label the boxes and just wipe with a damp cloth to erase and relabel as necessary.

The boxes are not quite large enough to fit a 12"x18" paper. If you are like me though, I often cut papers to a slightly smaller size for production of art. Then I use the 12"x18" paper at full size as a backing/boarder paper. So it is conceivable to use these boxes to store student artwork by table or by class.

Do you have any tips or tricks that you use for storing your supplies?

Friday, August 23, 2013

Art Room Jobs

I am always game to try new things, or to try old things that I haven't tried before. This year I am giving each of my students their own jobs. In the past I have not so randomly chosen students to perform tasks in the art room. The kiddos noticed sooner than I did that I often chose the same students. I don't think it's because I really wanted to choose the same students, but as I have been telling the kids this year "You draw attention to yourself everywhere you go. You get to choose if you draw positive attention or negative attention." I really leaned towards those students who were drawing the most attention. I gave jobs to the students who were always making great choices because they are reliable helpers. I gave jobs to the students who were always testing the boundaries of my expectations so that they could have a more positive place to focus their energies. Often, I would over look the students that fell somewhere in the middle; the students without that strong of an attention beacon. I hope that by assigning each student a job, I can create a more harmonious vibe in the art room, give even responsibilities to my students, and nix the guilt that I felt from not giving attention to those that fell under my radar.

The four jobs were outlined in my beginning of the year Prezi, found here. I also created a wheel type chart with each of the jobs listed. My monsters hold a flag that corresponds to numbers on each of my painted tables.
My students know that I love to make monsters! So, why not have job monsters?


 I created the little monsters on tag board and gave them a little flag with the table number. They have a clothespin on their back so I can rearrange them around the circle each week to evenly distribute the jobs.

We've only had week one of school and I've just introduced the jobs, but I can see on their faces how empowered the students feel. They are stoked to help pass out materials, they show extra pride when taking care of the supplies and even the volume control monitors and floor detectives mean serious business. Win win all around!

Sunday, August 18, 2013

Welcome Back, Students!

I am constantly amazed at technology. With a vast array of tools at our fingertips not only can we create in the real world, but we can also create in  a virtual/digital world. In the past I have used Powerpoint and SmartNotebook to present beginning of the year expectations, grading criteria and other classroom information. Today, I dove into the world of Prezies.  I was inspired to try Prezi because of presenters at the Florida Art Education Association conference last year, the beginning of the year presentation to the visual arts teachers in my school district and finally from a pin on Pinterest. If you haven't given it a try I recommend it; look for their educational accounts when you sign up! This online application is very easy to use and creates dynamic presentations that I'm sure my students will remember.

Wow! That sounds like an advertisement. I assure you that I am not getting paid by this company. I will have to make some additions the Art Room Expectations section of this Prezi. There are some bullet points for each expectation that I will add later from a poster in the art room to ensure that I am being consistent.


I took inspiration from  video game designer Jane McGonigal for the Art Room Power Ups section. Click on her name to see her TedTalk. Essentially students can earn a point for each of the power ups. It's my way for keeping track of student grades. They earn points for following directions, craftsmanship, skill, critical thinking and knowledge with a total of five points for the day. I hope that students see my class as a game where they can excel.

Have you used Prezi? What were your successes?

Friday, August 16, 2013

What's the Theme?


Student response to the theme I presented to them last year was overwhelmingly positive. Choosing a theme has helped me stay focused when looking to subject matter for projects in the art room. I originally selected a theme with high hopes that I would be better able to put together a cohesive art show for the end of the school year. In 2012-13, students created plenty of great 'out of this world' artwork where they explored outer space, aquatic worlds, microcosms and places only found in their imaginations.

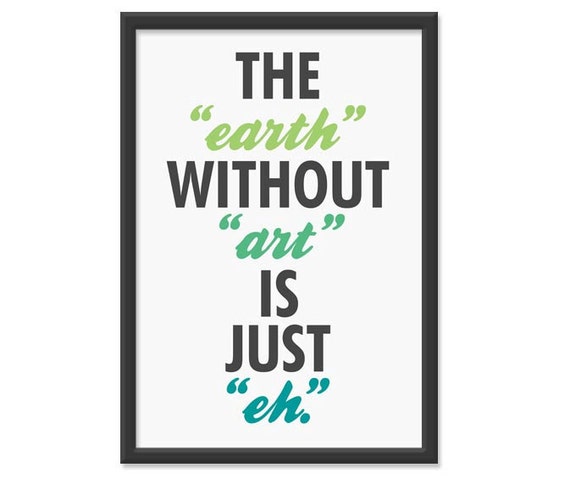
The "earth" without "art" is just "eh." 13x19 Print

This year I took inspiration from a quote that was making it's rounds on Pinterest. (as I'm new to blogging, I want to give proper credit and I hope I'm doing the right thing. I have linked the above picture to it's original webpage, the same webpage that my 'pin' on Pinterest links to. Please, if you are an experienced blogger and have any advice on this, let me know!)

The theme bulletin board at the front of the room.

I realize now that I took some liberties with the wording, but I think the message remains as strong. I created the central image with torn paper collage and used the die cut machine for the lettering. Along the sides and bottom of the board I posted some images from a great page-a-day calendar that features works from The Metropolitan Museum of Art. I tried to select images that represented a broad range of culture and geography.

I hope that the theme this year will help inject more historical and cultural references into my students artwork. 

What is your theme, if you use one?